

Fences can be damaged by a variety of forces. Some, like broken or bent posts, may need to be replaced entirely. Others can be straightened and reinforced.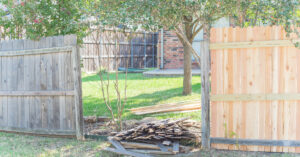
If your fence post is leaning, dig with a shovel or demolition bar until you expose the concrete footing. Then replace the old post and set it in concrete.
A leaning fence isn’t just an eyesore; it’s also a potential safety issue. Fortunately, with a little time and the right tools, you can straighten a fence post and stabilize the entire fence. Just make sure to use proper safety equipment like safety glasses and gloves when working with heavy or unwieldy materials, and have a friend assist you with any tasks that require two people.
First, you’ll need to determine why the fence is leaning. This may be as simple as the post simply being rotted at its base or the ground giving way and pulling it out of place. It may also be more serious, such as a broken or cracked concrete footer.
Using a shovel, dig around the base of the leaning fence post to reveal the condition of the footer. If the footer is cracked, chipped, or broken, it will need to be replaced.
Next, remove the old footer, if needed, and grade the soil away from the base of the fence post to prevent water from pooling around it and rotting the concrete. You can then install a new concrete footer or a metal brace that goes across the length of the post and attaches to the other side. If you choose to install a new footer, you’ll need to mix and pour concrete, which is a bit more time-consuming than using a pre-mixed product.
You can also reattach the fence panel to the new post by screwing it in place with screws (potentially new ones, if needed). Check the stability of the leaning fence post before and after adding any fasteners, as you’ll need to do this again if the post continues to shift over time.
Another way to fix a leaning fence post is to use expandable foam. This is a quick, inexpensive solution that can be used on wood or concrete posts. Just make sure to follow the manufacturer’s instructions carefully. After applying the foam, you’ll only have about five minutes to adjust the post before it hardens. If you can’t do that, you may need to hire a professional.
Rotten Posts
The wood posts that hold the rails of your fence can begin to rot when they come into contact with too much water. This is a common problem for wooden fences, and it can be quite dangerous. If a single post begins to break down, it can pull on other fence sections and eventually collapse the entire structure. This is why it is important to take care of rotten posts immediately.
It is possible to repair a rotted wooden fence post, but the first step is determining what kind of damage has occurred. Generally, the cause of the damage will be either wet or dry rot. Wet rot is caused by continuous exposure to moisture, while dry rot occurs when the natural oils that protect the wood are stripped away.
In order to properly fix a rotten fence post, you must remove the old one and replace it with a new, sturdy one. To do this, you must dig a hole that is at least twice the size of the fence post’s diameter. The hole should also be between 24 and 48 inches deep. Once the hole is dug, you can set the new post and fill it in with concrete. It is a good idea to mix concrete that will hold up to the elements, such as fast-drying Portland cement.
After setting the new post, you can add a fence rail to it using galvanized nails or screws. For added protection, you can apply a stain to the new post. Staining will help to keep rot-causing moisture out of the wood, and it can be applied at the time of installation or at regular intervals throughout the life of the fence.
In cases where a rotten fence post cannot be replaced, you can use steel splints to stabilize it. These are available at most home improvement stores and are easy to apply. For example, E-Z Mender splints are made for reinforcing 4 x 4 fence posts and are designed to be set in concrete footings. These splints are U-shaped, 28-inch-long jackets made of 12-gauge steel that’s powder coated to prevent rust. The end of each splint is shaped to a point and has a nailing lug punched in it.
Broken Rails
A broken rail may appear to be a minor issue, but it can compromise the integrity of the entire fence. Everything from falling limbs to climbing kids can bend your rail, so be sure to repair it as soon as possible to prevent further damage and protect the safety of those who use the fence.
Broken rails are one of the leading causes of train derailments, which can be deadly for workers on board a moving train. Although technological advances have reduced the number of train derailments, there is still a risk of injury and death if a train hits a broken rail.
There are some steps you can take to prevent broken rails, such as regularly testing your railroad track with new technology. The technology is designed to detect cracks in the tracks so they can be fixed before they become dangerous. However, some railroad companies rely on old methods of testing and don’t carry out the tests often enough.
To repair a damaged rail, first locate the existing rail and determine its size. You’ll also need to decide whether the replacement section will be a full length of rail or a partial one, depending on what needs replacing. Once you’ve found the existing rail, remove it from the post using a wrench or adjustable tool.
Next, straighten the bottom hook of the new rail section and unhook it from the roll of fencing. Using the existing rail as a guide, measure about 12 links longer than the damaged area to determine the width of the new fence section. Then unhook the other end of the new section and remove it from the fence.
Once you’ve removed the old section of fence, straighten the bottom of the new section to match the length of the damaged area. Then, hook the new section onto the existing chain-link and secure it with wire ties, using the same method as the old section of fence.
When you’re done, nail the bottom rail in place, starting from just above grade and driving a 10D galvanized nail at both ends of the new section. Then, apply a generous coat of wood preservative to the rail to prevent further damage from moisture and insects.
Broken Pickets
Even the best fences will eventually need some maintenance. Depending on the type of fence, damage may occur over time or from an event like a storm. You can make some temporary fixes to a fence that’s sagging, mildewed, or broken, but it’s important to address chronic problems as soon as you see them.
The most common repair for a wood fence is to replace rotten pickets. If a picket has become completely rotted, it’s best to remove the whole board and replace it with a new one. Otherwise, the rot will spread and compromise the entire fence panel.
If only a portion of the picket is rotted, you can often save it by cutting off the affected area and using wood preservatives to protect it from further damage. You should also treat the surrounding boards to prevent the rot from spreading.
A good rule of thumb is to replace any boards that are more than 30% rotten. Once the rot spreads, it can quickly undermine the integrity of the entire panel and create holes in your yard.
Wood fence panels can break or be damaged by a variety of events, including storms, falling branches, and heavy vehicles. Most fence panels are made of wood, so they’re susceptible to decay if not properly cared for. Wood fences typically last about eight or ten years, so you should inspect them regularly to look for early signs of deterioration.
If a panel is damaged, it’s often easy to replace it with a new one. Screw blocks of wood to the posts on either side of the damaged panel and under the bottom rail. Remove the screws holding the old panel to the posts and let it fall onto the blocks. Then, screw the new panel into place and reattach the bottom rail.
A broken rail can be more challenging to fix. You’ll need lineman’s pliers, a reciprocating saw, and a new section of railing. First, cut both ends of the bent railing with a saw, and then slip the sleeve of the coupling rod into one of the cuts.