Bathroom Remodeling
Bathroom Remodeling

How Bathroom Remodeling Can Increase Your Home’s Resale Value

Bathroom Remodeling is a popular home improvement project that increases your home’s value and improves the space’s functionality. It is also a great way to add style to your bathroom. For bathroom remodeling needs, contact Dallas Contractors.

Bathroom RemodelingWhen thinking about a bathroom makeover, it’s important to understand the difference between renovation and remodeling. Some cosmetic changes, such as repainting and replacing a mirror, are more of a refresh than a full renovation.

One of the best things about bathroom remodeling is that it can add significant value to your home. In fact, it’s often considered one of the top renovation projects to improve resale value. That’s because potential buyers are likely to pay more for a home with a sleek, modern bathroom. In addition, a well-designed bathroom can make the rest of your home look better.

However, it’s important to understand the difference between remodeling and renovating. A renovation project involves upgrading features without changing the original design, while a remodel will change the layout or structure of the room. For example, you might turn a bedroom into a bathroom or change the entire floor plan of the space.

Whether you’re planning to sell your home in the future or not, it’s always a good idea to invest in bathroom remodeling. It can increase your comfort and enjoyment of the space, and it will also help to keep your home in good condition.

Many homeowners worry about the expense of a bathroom remodel, but it’s actually a relatively affordable renovation project. In addition, you can save money by reusing the existing fixtures and finishes, such as bathtubs and showers.

It’s also a good idea to invest in energy-efficient upgrades, such as new toilets and showerheads. These improvements will not only save you money on utility bills but will also improve your home’s environmental footprint.

Another way to boost your home’s value is to add more storage space. Buyers will be looking for extra cabinet and shelving space for linens, cleaning supplies, and toiletries.

Lastly, it’s a good idea to hire a professional contractor for your remodel. A professional can help you avoid costly mistakes and ensure the job is done properly. Plus, they can help you choose the best materials for your budget.

A well-designed bathroom can add a lot of value to your home, but it’s important to do it properly. By following these tips, you can get the most out of your remodeling project and improve your chances of recouping your investment when it’s time to sell.

  1. Create a more functional space

Bathroom Remodeling can add functionality to your home by changing the layout, adding more storage space, or upgrading fixtures. It’s also the perfect time to add ADA-compliant features like grab bars, zero-depth entry showers, and wider doorways for easy access. These changes aren’t a large investment and will make your bathroom more user-friendly for aging and disabled family members.

One of the biggest complaints about bathrooms is their minimal storage. Whether it’s for towels or makeup, you need somewhere to put all your items. Remodeling your bathroom is the perfect opportunity to add more storage space to reduce clutter and keep everything organized.

There are many ways to add more storage to your bathroom, including installing recessed medicine cabinets and built-in shower shelves. You can also install a tip-out hamper or laundry chute to free up floor space. Additionally, there’s often unused space in the wall for between-the-studs storage that can be customized to fit your exact needs.

During your bathroom remodel, you can also upgrade your lighting and ventilation. This will help keep the room cleaner and healthier, and it will save on your energy bill. By replacing old light bulbs with energy-efficient LEDs, you can reduce your home’s electricity usage by up to 50 percent.

A bathroom remodel is also a great opportunity to update your water heater and appliances, which can save you money in the long run. Older water heaters are less efficient and will increase your energy bills. By switching to a tankless water heater, you’ll save money on your utilities and make your home more eco-friendly.

A bathroom remodeling project can be as simple or complex as you’d like. You can choose to change the flooring, paint or tile, add a new vanity or sink, or even swap out your tub for a walk-in shower. You can also opt for a major overhaul and do a complete gut job. A trusted design build remodeling firm can help you decide what changes will work best for your space. They’ll take into account the current layout, light levels, and size of your existing fixtures to create a plan that will maximize the functionality of your space.

  1. Make your bathroom more comfortable

As you make changes to your bathroom, consider how you can increase comfort. This might be a simple as adding a heated towel rack, or it could involve changing the layout of your room to better accommodate your needs. Considering the fact that the bathroom is such a damp and humid space, comfort can be hard to achieve without making some changes.

One of the best ways to do this is by incorporating some interesting textures into your space. For example, if you have white walls, try adding some roughly textured materials. This can add a touch of modern design to your room while still keeping the space looking clean and fresh.

Another way to improve your bathroom’s comfort is by adding more windows and natural lighting. This will help to keep the space well-ventilated and remove moisture that can cause mold and mildew. It will also help to reduce your energy costs, as it will be less likely that you’ll have to run the bathroom fan for long periods of time to prevent walls from getting wet and mirrors from fogging up.

If you have the space to do it, knocking out a wall and connecting your bathroom with your bedroom can be a great way to open up your room and make it feel bigger. You can also increase the amount of storage space in your bathroom by installing more cabinets, or by utilizing an empty corner for a linen closet.

The final way to improve your bathroom’s comfort is to include some personal touches that can help make it feel more like home. Whether it’s hanging a piece of art on the wall or placing a few plants in the space, these small details can really make a difference in how comfortable your bathroom is.

Bathroom remodeling can be an overwhelming project, but with the right knowledge and resources, you can remodel your bathroom and create a space that’s both functional and beautiful. With some careful planning and the help of a qualified contractor, you can create a bathroom that’s both modern and timeless.

  1. Increase your home’s resale value

A fresh and updated bathroom is a big selling point for any home, boosting its overall resale value. A new bathtub, shower, or toilet will increase your home’s resale value while adding functionality and comfort to the space for you and any future homeowners.

A new vanity will add more storage and a fresh look to the room, as well. Whether you opt for wood or granite, a well-chosen vanity will elevate your bathroom’s look and increase its resale value. Repainting your walls will also make a difference in the appearance of the room. White is a popular color, but dark greens or blues can add richness and depth to the space.

Another way to increase your home’s resale is by replacing your outdated fixtures and hardware. Updated light fixtures, a new sink and faucets, and a new toilet will all make your bathroom more functional and attractive. New cabinet doors and hardware will also enhance your bathroom’s look, especially if you choose a neutral color that is likely to appeal to many buyers.

While it may be tempting to incorporate high-end materials like marble countertops or stone floors into your bathroom remodel, keep in mind that potential homebuyers will not necessarily want these luxuries in their own homes and can often turn off those looking for more traditional finishes. In addition, trendy colors and details can quickly become dated and can detract from your bathroom’s overall look.

Extensive bathroom remodels that involve expanding the size of your room, moving plumbing lines, or altering a floor plan will be more costly and take longer to complete. Depending on your budget, you should consult with a professional before starting these projects. They will help you determine the best ways to improve your bathroom’s function and resale value while still keeping within your desired budget.

There is no one-size-fits-all approach to remodeling your bathroom. However, the most important factor is to consider your goals and decide how you’d like to use your space before starting any renovations. The key is to make your decisions carefully so that you can maximize the return on investment when it’s time to sell your home.

Fence
Fence

How to Fix Common Fence Repair Problems

Fences can be damaged by a variety of forces. Some, like broken or bent posts, may need to be replaced entirely. Others can be straightened and reinforced.Fence

If your fence post is leaning, dig with a shovel or demolition bar until you expose the concrete footing. Then replace the old post and set it in concrete.

A leaning fence isn’t just an eyesore; it’s also a potential safety issue. Fortunately, with a little time and the right tools, you can straighten a fence post and stabilize the entire fence. Just make sure to use proper safety equipment like safety glasses and gloves when working with heavy or unwieldy materials, and have a friend assist you with any tasks that require two people.

First, you’ll need to determine why the fence is leaning. This may be as simple as the post simply being rotted at its base or the ground giving way and pulling it out of place. It may also be more serious, such as a broken or cracked concrete footer.

Using a shovel, dig around the base of the leaning fence post to reveal the condition of the footer. If the footer is cracked, chipped, or broken, it will need to be replaced.

Next, remove the old footer, if needed, and grade the soil away from the base of the fence post to prevent water from pooling around it and rotting the concrete. You can then install a new concrete footer or a metal brace that goes across the length of the post and attaches to the other side. If you choose to install a new footer, you’ll need to mix and pour concrete, which is a bit more time-consuming than using a pre-mixed product.

You can also reattach the fence panel to the new post by screwing it in place with screws (potentially new ones, if needed). Check the stability of the leaning fence post before and after adding any fasteners, as you’ll need to do this again if the post continues to shift over time.

Another way to fix a leaning fence post is to use expandable foam. This is a quick, inexpensive solution that can be used on wood or concrete posts. Just make sure to follow the manufacturer’s instructions carefully. After applying the foam, you’ll only have about five minutes to adjust the post before it hardens. If you can’t do that, you may need to hire a professional.

Rotten Posts

The wood posts that hold the rails of your fence can begin to rot when they come into contact with too much water. This is a common problem for wooden fences, and it can be quite dangerous. If a single post begins to break down, it can pull on other fence sections and eventually collapse the entire structure. This is why it is important to take care of rotten posts immediately.

It is possible to repair a rotted wooden fence post, but the first step is determining what kind of damage has occurred. Generally, the cause of the damage will be either wet or dry rot. Wet rot is caused by continuous exposure to moisture, while dry rot occurs when the natural oils that protect the wood are stripped away.

In order to properly fix a rotten fence post, you must remove the old one and replace it with a new, sturdy one. To do this, you must dig a hole that is at least twice the size of the fence post’s diameter. The hole should also be between 24 and 48 inches deep. Once the hole is dug, you can set the new post and fill it in with concrete. It is a good idea to mix concrete that will hold up to the elements, such as fast-drying Portland cement.

After setting the new post, you can add a fence rail to it using galvanized nails or screws. For added protection, you can apply a stain to the new post. Staining will help to keep rot-causing moisture out of the wood, and it can be applied at the time of installation or at regular intervals throughout the life of the fence.

In cases where a rotten fence post cannot be replaced, you can use steel splints to stabilize it. These are available at most home improvement stores and are easy to apply. For example, E-Z Mender splints are made for reinforcing 4 x 4 fence posts and are designed to be set in concrete footings. These splints are U-shaped, 28-inch-long jackets made of 12-gauge steel that’s powder coated to prevent rust. The end of each splint is shaped to a point and has a nailing lug punched in it.

Broken Rails

A broken rail may appear to be a minor issue, but it can compromise the integrity of the entire fence. Everything from falling limbs to climbing kids can bend your rail, so be sure to repair it as soon as possible to prevent further damage and protect the safety of those who use the fence.

Broken rails are one of the leading causes of train derailments, which can be deadly for workers on board a moving train. Although technological advances have reduced the number of train derailments, there is still a risk of injury and death if a train hits a broken rail.

There are some steps you can take to prevent broken rails, such as regularly testing your railroad track with new technology. The technology is designed to detect cracks in the tracks so they can be fixed before they become dangerous. However, some railroad companies rely on old methods of testing and don’t carry out the tests often enough.

To repair a damaged rail, first locate the existing rail and determine its size. You’ll also need to decide whether the replacement section will be a full length of rail or a partial one, depending on what needs replacing. Once you’ve found the existing rail, remove it from the post using a wrench or adjustable tool.

Next, straighten the bottom hook of the new rail section and unhook it from the roll of fencing. Using the existing rail as a guide, measure about 12 links longer than the damaged area to determine the width of the new fence section. Then unhook the other end of the new section and remove it from the fence.

Once you’ve removed the old section of fence, straighten the bottom of the new section to match the length of the damaged area. Then, hook the new section onto the existing chain-link and secure it with wire ties, using the same method as the old section of fence.

When you’re done, nail the bottom rail in place, starting from just above grade and driving a 10D galvanized nail at both ends of the new section. Then, apply a generous coat of wood preservative to the rail to prevent further damage from moisture and insects.

Broken Pickets

Even the best fences will eventually need some maintenance. Depending on the type of fence, damage may occur over time or from an event like a storm. You can make some temporary fixes to a fence that’s sagging, mildewed, or broken, but it’s important to address chronic problems as soon as you see them.

The most common repair for a wood fence is to replace rotten pickets. If a picket has become completely rotted, it’s best to remove the whole board and replace it with a new one. Otherwise, the rot will spread and compromise the entire fence panel.

If only a portion of the picket is rotted, you can often save it by cutting off the affected area and using wood preservatives to protect it from further damage. You should also treat the surrounding boards to prevent the rot from spreading.

A good rule of thumb is to replace any boards that are more than 30% rotten. Once the rot spreads, it can quickly undermine the integrity of the entire panel and create holes in your yard.

Wood fence panels can break or be damaged by a variety of events, including storms, falling branches, and heavy vehicles. Most fence panels are made of wood, so they’re susceptible to decay if not properly cared for. Wood fences typically last about eight or ten years, so you should inspect them regularly to look for early signs of deterioration.

If a panel is damaged, it’s often easy to replace it with a new one. Screw blocks of wood to the posts on either side of the damaged panel and under the bottom rail. Remove the screws holding the old panel to the posts and let it fall onto the blocks. Then, screw the new panel into place and reattach the bottom rail.

A broken rail can be more challenging to fix. You’ll need lineman’s pliers, a reciprocating saw, and a new section of railing. First, cut both ends of the bent railing with a saw, and then slip the sleeve of the coupling rod into one of the cuts.

Split Rail Fencing
Fence

Split Rail Fencing for a Rustic Look

Split-rail fencing at Charlotte Fence Company provides a classic, rustic look that pays homage to rural living. Typically made of cedar, these fences can complement any home and provide a sense of charm that stands out.Split Rail Fencing

These fences are also relatively easy for homeowners to install. This article will discuss different types of split rail fences and their benefits.

Cedar split rail fences are one of the most cost-effective styles for defining property boundaries, decorating yard areas, and fencing in livestock and horses. This rustic style is also easy to install, making it an ideal do-it-yourself project. Posts are set directly into the ground, approximately. 30″ deep without any concrete. Using a tamping bar, the dirt is compacted around the posts to make it secure for use.

Cedar is one of the most durable types of lumber available for split rail fences and is naturally resistant to decay, insects, and fungus. Its natural color allows it to be left untreated or stained to match the decor of your home and other structures on your property. Cedar is also extremely lightweight, allowing it to be easily handled and used to construct this type of fence.

Pine is another popular option for split-rail fencing. Although it is less expensive than cedar, it isn’t as durable and may require more maintenance over time. Additionally, pine has a yellowish color that may not appeal to all homeowners.

In addition to determining the right lumber to use for your split rail fence, you’ll also want to consider factors like the amount of material needed and the total installation cost. While you can save money by purchasing your own materials, hiring a professional can be the best way to ensure that your fence is built properly and safely.

When estimating the cost of installing your cedar split rail fence, you’ll need to take several factors into account, including:

The amount of materials needed will be the largest factor in determining your fence’s cost. If you’re fencing a large area, the cost will increase for each additional linear foot of fencing. The number of rails per section will also affect the overall cost. Choosing a 3-rail fence instead of a 2-rail fence will cost more, but it will be sturdier and better suited for your needs.

Other factors that will influence your final fencing costs include the terrain where your split rail fence is being installed, the type of soil you’re working with, and the time of year when you’re purchasing your materials. Homeowners who are interested in saving money on their fence installation costs should shop around and compare quotes before making a decision.

Black Locust

Wood split rail fences are one of the most traditional fencing styles, and they are a great option for those looking for a rustic and natural-looking fence. These fences are typically made using black locust posts with hard wood rails. They can be used for a number of purposes, including containing livestock and defining property boundaries. The fences also provide a scenic backdrop for property views. There are several advantages to a wood split rail fence, including its durability and low maintenance.

Black locust split rail fences are very strong, and they can withstand the elements for decades without the need for treatment or chemical applications. They are also rot-resistant and insect-proof. This makes them an excellent choice for a farm or ranch fence. Additionally, the black locust split rails have a distinct greenish-yellow tint when first cut that will darken to a golden color over time.

Cedar is another common choice for a wood split rail fence, but it can be more expensive than other types of lumber. Additionally, cedar is not as durable as black locust, and it is more susceptible to rotting in wet soil conditions. However, it is an attractive option for those who want a classic cedar fence, and the wood’s natural ability to resist moisture and insects makes it a good choice in many climates.

Western red cedar is also a common type of split rail fence, and it is an excellent choice for those who want a fence that will last for years without the need for chemical treatments. These fences are also resistant to rot, and they will not lose their shape or strength over time.

Compared to western red cedar, pressure-treated yellow pine is less expensive, but it is not as durable. This type of wood can be treated with chemicals to fight rot and other destructive forces, but it is not as strong as either black locust or black locust split rails.

Depending on the region, black locust can be purchased at a moderate price. It is a dense wood, and it is often mixed with other hardwoods to create a more affordable fence. It can also be purchased pre-treated to combat the effects of weathering and aging.

Two-Rail

Split-rail fencing is a great way to add a rustic and natural look to your property. It’s also relatively inexpensive, making it a good choice for homeowners who want to keep their pets and kids safe on their property without breaking the bank. However, there are a few things you should know before having this type of fence installed.

A two-rail split-rail fence is a common choice for residential properties and country gardens. This type of fence provides clear boundary definition and works well with a variety of home styles and designs. Additionally, it doesn’t block your views or landscapes like other types of fencing can, allowing you to enjoy the beauty of nature that surrounds you.

Most often, this style of fence is made of oak, which has a beautiful grain pattern and natural color that will hold up to the elements over time. Cedar is also a popular material for split rail fencing, but it can be more expensive than oak.

Another option for a split rail fence is high-quality poplar, which has a similar appearance to cedar but is more affordable. If using poplar, make sure it’s pressure-treated to increase durability and longevity.

In addition to the cost of materials, there are other factors that can affect the total cost of your split-rail fence. For example, the amount of labor involved will play a role in the overall price. If you choose to have a professional install your fence, it’s important to get several quotes before choosing a contractor. This will help you avoid overpaying and ensure that you’re getting the best value for your money.

One of the most significant ways to lower your split rail fence cost per foot is to stain or paint the wood. This will protect the wood from weathering and rot and prolong its life. Additionally, it can help to give the fence a more appealing color, which will attract less attention from unwanted pests and weeds.

Another way to save on the cost of a split rail fence is to install it yourself. While this can be a challenging project for beginners, it is not impossible. Depending on the size of your yard and the number of split rail posts needed, this can be an affordable option for homeowners who have the time and tools necessary to complete the project.

Wire Mesh

Split-rail fencing gives your property a pastoral feel that evokes images of horses and cowboys. However, the wide gaps between split pickets can leave your garden vulnerable to smaller animals like foxes and coyotes. To keep these creatures out of your garden or prevent them from attacking livestock, you can add wire mesh to your split-rail fence. Wire mesh is relatively inexpensive and can be easily attached to your existing split rail fence, though you may want to consider having a contractor do it for you.

Whether you’re installing a wood, composite, or metal split rail fence, the price is going to be dependent on how much of your property you’re fencing in and what material you choose. Homeowners who have construction experience can often save money on their split rail fence installation by doing it themselves rather than hiring a professional contractor. However, this isn’t always possible for homeowners who aren’t comfortable working with power tools.

When determining your split rail fence cost, you should start by getting a quote on how much materials and labor are going to cost for the project. To get a more accurate estimate, enter the specific details of your project into our fence calculator. Once you’ve determined the amount of material and labor your project will require, you can begin planning the construction.

Before starting to build your fence, it’s a good idea to set, plumb, and brace your corner posts first. This will give you fixed points to work off of, and it will help ensure that your fence is perfectly straight. You should also use a level to make sure that each post is evenly spaced and has an even slope.

Once your corner posts are set, it’s time to begin constructing the rest of your fence. It’s important to start with a strong foundation, so be sure to use concrete or stakes in your holes. When adding stakes, it’s a good idea to use steel ones rather than wooden ones. These stakes will be more durable and last longer than wooden ones.

Concrete Repair
Concrete Services

Concrete Repair Tips for Homeowners

While most concrete cracks are easy to repair, others may require a professional. For example, large cracks or ones that compromise the integrity of walls and floors require a licensed contractor.Concrete Repair

One of the most common concrete repair tasks is filling in cracks. Contractors should consider the type of cracking as well as its causes before deciding on the right method to use for each job. For example, epoxy injections may help stabilize a crack, but they aren’t a permanent solution and do not address the underlying cause of the cracking. If you need some helping hands, you can call Concrete Contractor Colorado Springs.

In this situation, contractors should look into solutions such as concrete leveling or other structural repair methods that can correct the underlying problem and prevent future cracking. Regardless of the specific method, proper preparation is the key to success. Contractors should take steps to ensure the repair material will bond and last, such as by conducting a pull test or mock-up of the area with the intended repairs.

Before the actual repair begins, contractors should clean the crack area to remove any loose debris that could prevent the filler or patch mix from adhering. Any dirt, oil, or paint must be removed, as they will interfere with the integrity of the repair and could break apart or wash away with water runoff. It’s important to also make sure the crack is dry and clean so that the new materials will adhere properly.

Once the crack is cleaned, contractors should chisel the edges of the crack to create a backward angle, which will mechanically lock the new concrete in place. This can also prevent the crack from reopening or widening as it sets. Then, they should clean the crack of any sand, gravel, or other materials that may have fallen into it. This will allow the crack to close tightly against the new concrete and reduce moisture infiltration that could cause further damage.

Once the crack is prepared, contractors should apply a suitable crack repair product, such as a polyurethane sealant or concrete repair mortar. These products offer better performance and durability compared to latex-based options, as they are not affected by humidity or cold weather. Typically, they can be used for cracks up to 3/8 inch deep and 1/2 inch wide. For larger repairs, contractors can use crack stitching. Stitching uses U-shaped metal bars of varying lengths, which are inserted into the crack and then filled with grout to form a “key.” This helps to distribute the tension across the entire crack and prevent it from further movement.

Repairing sunken areas

Concrete is very durable, but it does have a “shelf life.” After a while, the concrete in commercial and industrial facilities will begin to sink or settle. This can be very costly and may impact the integrity of the structure.

Fortunately, there are several methods to fix this problem. A professional contractor can evaluate the situation to determine what approach is best for your facility. There are three main repair options:

Conventional placement of new concrete

This method is a good choice when the damage is limited to only one or two areas of a slab. It can also be used to repair sections of honeycombing in concrete walls. This method requires careful preparation to make sure the new concrete will bond to the existing structure. Typically, a low water-to-cement ratio and a high percentage of coarse aggregate are required.

Chemical admixtures can be added to the concrete mix to reduce corrosion and help it resist cracking. It is important to use a quality bagged concrete mix for the best results, especially when repairing old concrete. Many hardware stores sell liquid chemical additives that can be added to the concrete. These additives can be helpful, but they should not replace careful preparation of the base and careful execution of the repair work.

Once the repair area has been prepared, it should be thoroughly cleaned and swept to remove any loose dirt or debris. It should then be primed with neatly blended epoxy immediately prior to placing the concrete mixture. It is important to have the epoxy completely absorbed into the concrete surface. This will ensure a good bond with the concrete and prevent chloride ingress into the repaired area.

Once the epoxy has cured, the concrete mixture can be placed and tamped. The new concrete must be placed and consolidated to eliminate essentially all voids at the interface with the existing concrete. It is important to tamp the repair material hard enough to produce full density and to minimize shrinkage and cracking. It is also important to have the concrete material have sufficient flexural strength, abrasion resistance, and durability.

Repairing delaminated areas

Concrete contractors have to keep a variety of tools on hand for repairing delaminated areas. These might include a hammer, spray paint, and a tape measure. They also need to bring a hose or pressure washer to get the concrete surface clean. A wire brush can help with cleaning and allow the repair material to better bond with the concrete surface. The repairing contractor should have access to a paddle mixer so they can mix the repair materials. A caulk gun might be needed for certain repairs or if the concrete damage is extensive.

In the case of a concrete slab that has experienced delamination, it is important to identify the problem and address it before it worsens. This will reduce the risk of additional delamination and extend the life of the concrete structure. Delamination can be caused by water penetration, chemical attack, or structural overloading. It may also be the result of poor construction or construction errors.

Choosing the best concrete repair material for delaminated areas is vital. It should be able to adhere to the damaged concrete and be compatible with any other materials that will be used in the repair project. The contractor should consider the intended purpose for the concrete repair and choose a material that will have an appropriate bond strength, flexural strength, and compressive strength. A quick-setting, non-shrink mortar is usually the most suitable choice for most repairs. Polymer concrete is another repair material that can be used in concrete repair.

A thorough inspection of the concrete can help identify the delaminated areas and determine the cause. If the delamination is due to steel rebar corrosion, sandblasting and patching will be necessary. In the event that delamination is caused by concrete shrinkage, a concrete repair technique known as epoxy injection can be used to bond the repaired area with the rest of the slab.

The repairing contractor should always make sure that the concrete is saturated surface dry (SSD) before beginning any work. Any water on the surface will cause a weak bond between the repair material and the concrete surface. The contractor should also avoid using any de-icing salts on the concrete during or after construction because these can damage the surface and lead to future delamination.

Repairing Slabs

Concrete slabs play a large role in the residential landscape, from building foundations to driveways and outdoor patios. When properly laid and cured, they are strong enough to endure years of heavy use. However, like all materials, they can wear out over time. Some signs of damage are easy to miss, such as cracks and sunken areas. Others, such as sagging and upheaval, are more obvious and can indicate more serious issues. If a homeowner sees any of these signs, it’s important to take action.

Concrete is made from cement and aggregate, a mixture that is hardened in water. The aggregate provides the structural support for the concrete. The cement also creates a chemical reaction that sets the concrete. The chemical process generates a lot of heat, which is why concrete cracks. This is why engineers add control joints during construction to limit the areas that are likely to crack. Slabs that are used frequently, like driveways and patios, experience more cracking than those that are rarely used, such as building foundations.

Slabs can sink due to soil that wasn’t compacted sufficiently during construction, and the weight of the slab can cause it to sink. This is typically a more serious issue than cracks, as it can compromise the structure of the home or slab. A sunken slab also poses a trip hazard, and trips are among the leading causes of homeowners’ insurance claims.

A concrete repair contractor can help level a sunken slab. Traditionally, this was done with mudjacking, which involved drilling holes in the concrete and mixing soil into it. Mudjacking was messy and chaotic and didn’t address the root cause of the problem, which was soil that wasn’t compacted properly. Today, most contractors use a process called PolyLevel to inject a polyurethane foam under the concrete that lifts it back to its original position. PolyLevel is quick, noninvasive, aesthetically pleasing, and doesn’t retain moisture.

In many cases, repairing a cracked or damaged concrete slab is simply a matter of resurfacing it. This can be as simple as applying a thick coating of concrete epoxy, or it may require a more extensive repair with carbon fiber reinforcement products. These can add tensile strength across the crack and strengthen the entire slab, preventing it from moving again in the future.

Masonry Contractors
Masonry Contractors

What Is Masonry?

Masonry consists of bricks, stone or concrete that are put together to form walls and buildings. Masonry Charleston SC is durable and can resist damage from earthquakes, hurricanes and other natural disasters. Masonry quietly promotes the principles of morality and encourages good work within the community. Its members oppose oppression, tyranny, fanaticism, and usurpation of power.

Masonry ContractorsBrick is a popular construction material and has been since ancient times. It is inexpensive to produce and easy to shape with a variety of tools, making it a versatile building material. It is also easily worked by hand or by machine, making it ideal for jobs where skilled tradespeople are scarce.

Different types of brick are used in masonry construction and have various characteristics, such as color, surface texture, density, weight, water absorption, pore structure, thermal behavior, fire resistance and more. These factors are important to determine the correct type of brick for a specific job.

Most brick is rectangular in shape and made of clay. However, there are a number of variations in the type of clay used and the method of manufacture, which can change how well a brick performs.

Sand lime bricks, which are commonly used in Masonry, consist of sand, lime and fly ash that are bonded through a detailed chemical process. This creates a brick that is extremely durable and can effectively resist frost, acid and water. Engineering bricks are also made of clay but are fired at very high temperatures, allowing them to withstand extreme pressure and limit water absorption.

There are other varieties of bricks that can be used in masonry, including pressed, dry-pressed and extruded. Each has its own advantages and uses, depending on the particular application.

The main reason brick remains a popular choice is its durability and versatility. It is also relatively easy to cut and can be shaped into a variety of forms to meet various needs, such as window sills or archways.

The earliest brick structures were made of primitive materials such as mud and sand, but with time and advances in technology, the brick industry has developed. It has become a highly refined art form, with masons often taking pride in the finished product. Bricks are typically adorned with inscriptions, symbols and designs. They are also often used for decoration and can be carved, colored and painted in a variety of ways. Masonic symbols are usually drawn from the tools of a mason, such as the square and compasses, trowel, level and plumb rule.

Stone

Stonemasons use a variety of materials to build walls and structures. These materials can include stones, bricks, concrete blocks and other prefabricated units. They also may incorporate wood framing, metal reinforcement and other components. Masonry is a skilled trade, and good workmanship is important for its durability and aesthetics.

Stones used in masonry include granite (igneous), limestone and sandstone. These rocks are obtained from the earth in quarries or mines, where they are carved and cut into slabs for further work by masons. Limestone is a sedimentary rock made up of the minerals calcite and aragonite. It is primarily used as a building material and may also be used as aggregate for road construction or as a source of white pigment.

A popular trend in recent times is to use sandstone, limestone and slate to design the exterior of a home or commercial building. These natural materials offer a warm, rugged appeal and add beauty to the structure. They also enhance thermal performance and help protect the property from damage by weather, insects and other elements.

There are several styles of stone masonry, including rubble and squared rubble. Rubble masonry uses stones that have been dressed, or shaped, with hammers and chisels to create uniform joints between the pieces. This style can be coursed or uncoursed, with a coursed variation using larger stones and defined horizontal joints and an uncoursed variation using smaller stones and no defined vertical or horizontal joints. A further subcategory of rubble masonry is polygonal rubble, where the stones are dressed into irregular shapes that give the structure an appearance of great strength and complexity.

For stonework in which the beds and sides of the stones are finely chiseled but the exposed faces are rough, there is a technique known as ashlar rough masonry. This is a compromise between the two styles, as it provides the benefits of a fine-faced finish and a more durable surface. This type of masonry is typically used for quoins, voussoirs and other architectural details. It is also used for steps, parapets and copings on buildings.

Concrete

Concrete is an integral part of masonry and contributes to the strength, durability, fire resistance, energy efficiency and sound attenuation of a wall system. Concrete masonry units are manufactured in a wide variety of shapes, sizes, colors and architectural finishes to achieve any number of appearances and functions. A broad sampling of available unit types and construction methods is shown in TEK 14-6, Concrete Masonry Bond Patterns.

The construction of a property using masonry materials can take longer than properties constructed with other components. This is due to the fact that mortar must be prepared on-site. Additionally, weather conditions can impact masonry construction, as teams may not be able to work during rain and other cold or damp conditions.

Stone, brick and concrete are strong and durable building materials that can withstand heavy loads without damage. Masonry also offers resistance to the growth of insects and mold, as well as to noise pollution caused by traffic and railroad tracks.

While masonry construction can be time-consuming, there are some processes that help speed up the process. For instance, some manufacturers produce precast concrete products that can be delivered to the construction site ready for installation. This eliminates the need to transport raw materials, which saves time and money.

Other innovations in masonry construction include the use of post-tensioning in concrete structures. This technology adds an additional axial load to the structure, and thus increases the resistance of the wall to lateral force. This technique is becoming increasingly popular in commercial, industrial and residential construction, as it allows architects greater freedom with design features.

In addition to these technologies, masonry can be made more sustainable by using recycled or reclaimed materials. It is also often made locally or within a short distance of the construction site, which reduces transportation impacts and emissions. This helps contribute to green rating systems for buildings. In addition, masonry is durable and can last for a long time, which can decrease the cost of maintenance over the life of the building. This can be a major advantage for commercial and industrial properties, which tend to have more frequent tenant turnover.

Other Materials

Masonry is a popular choice of construction material because it offers versatility, architectural freedom and aesthetic beauty while providing durability, safety, minimum maintenance, and fire resistance. It also prevents moisture from damaging a structure and is an effective barrier to sound. Its thermal mass helps to reduce internal temperature fluctuations and peak loads on heating and cooling systems.

Modern masonry is typically constructed with bricks, concrete blocks, or structural clay tile and held together by mortar. Mortar for masonry is not the same as cement mix used in sidewalks or patios and contains lime, sand, and aggregate in the correct proportions.

Stone and clay continued to be the primary masonry materials through the Middle Ages and into early modern times. By the time of the Romans, a significant development was concrete, made from pozzolanic tuff mixed with water and aggregate to form a dense, lightweight material that could be cast into forms for walls and other structures. Concrete was a more cost-effective, quicker, and easier material to erect than stone masonry.

Concrete blocks are typically hollow and have a high compressive strength. They can be reinforced with steel to increase their tensile and lateral strength. They are ideal for load-bearing walls or for cladding that is not required to be structural. They are generally much cheaper than a comparable wall of stone or brick and are easy to cut into to create openings for doors and windows.

Blocks of cinder or ordinary concrete are often used to provide the structural core of veneered brick masonry and can be used alone as walls for factories, garages, or sheds. These blocks are fabricated from cement, sand, and aggregate and are available in a wide range of sizes. They are a faster and more economical option than brick because they do not require as much mortar for each course.

For cladding and other non-load bearing uses, concrete is usually mixed with aggregates and colorfast pigments to make it look like natural stone. It can be molded into different textures and finishes to mimic the appearance of stone, brick, or other materials. It is also used in concrete precast or tilt wall panel systems that can be produced to a precise architectural finish with a variety of colors and textures.

Roofing
Roofing

Updating Your Roofing

Whether the goal is to keep the sun out and the heat in or the opposite, proper roofing choices make your house more energy-efficient. These choices can also significantly reduce utility bills. 

Roofing
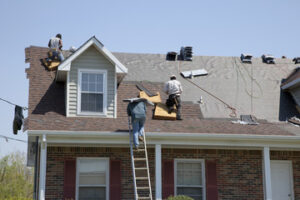
Roofs protect the interior of buildings from rain, snow, sunlight, extreme temperatures, and winds. There are many different roofing materials and construction methods.

History

As long as humans have existed there has been a need for shelter and roofing. The roof is a vital part of any building that provides protection from the elements, defines its exterior aesthetic and is often one of the first things that people notice about a structure. It is a fundamental part of every home and commercial building and has inspired thousands of years of architectural styles and developments.

In the early days of human evolution, the most basic need was to find or build shelter for themselves and their families. As early man began to move out of caves and onto the open land, they needed a place to live that provided protection from the harsh weather conditions they encountered. These early shelters were rudimentary and were made from whatever material was available at the time. Whether it was woolly mammoth skins, wood or rocks, the construction of these simple homes had to be as rugged as the terrain on which they stood.

The first permanent buildings and roofs began to develop around 40,000 BC. Early tent-like structures were constructed with reeds and mud that formed a conical shape to protect the inhabitants. As farming developed in these areas, rectangular huts with flat roofs were built using mud bricks and eventually stone became the preferred building material. In Egypt in the 3000’s BC, pyramids were built of stone that was brought from great distances by camel caravans.

Throughout history roofing has been a very important part of human life and as such has continued to evolve. With the introduction of new technologies, materials and manufacturing processes roofing has become much more refined and advanced.

The most popular type of roofing used in Europe in the 1700’s was natural slate or clay tiles, largely depending on which materials were easily accessible in each region. In areas where wood was abundant, thatch was used for roofing. This roofing style was also popular in equatorial countries due to its flexibility and lightweight nature. Asphalt shingles were introduced in the 1800’s and replaced wood shingle roofing because of the fire issues associated with this type of roof.

Materials

Roofing is one of the most visible parts of a home, adding to its aesthetic and communicating its style and design. Updating the roof is a great way to add value to your home and ensure it’s safe and weather-resistant. Choosing the right materials is essential to avoid costly repairs down the road.

The most popular roofing material is asphalt shingles, which are available in a variety of styles and colors to complement your home. They’re also relatively inexpensive and can last for up to 50 years.

Metal roofing is another durable option, made from a wide variety of materials including copper, steel, and aluminum. It can be molded to mimic other roofing materials, such as shingles or shakes, and is weather- and fire-resistant. Metal roofs are also lightweight and can be installed on flat or low-sloped roofs.

Another natural roofing material is slate, a type of rock that comes in several different shades and can last up to 200 years. Slate roofs are expensive, however, and require a heavy-duty underlying roof structure that must be designed to support the weight of the slate. Additionally, slate requires a specialist to install and is more difficult to repair than other roofing materials.

Clay tiles are a common roofing material in hot climates and are molded and fired for durability. They’re available in a variety of shapes and can be interlocked to form patterns. They’re more affordable than slate but are heavier and add significant weight to a roof, which can cause structural damage.

A less traditional roofing option is a green roof, which is essentially a small garden in the shape of your roof. Green roofs are great for managing water runoff and insulating a house, while also putting clean oxygen back into the air. Green roofs are also more expensive than other roofing materials and need extensive maintenance. Another option is membrane roofing, which is an affordable choice for low-slope or flat roofs and consists of large sheets of waterproof material topped with mineral granules. It’s also resistant to rot and insects.

Installation

To begin the installation process, the roofers will need to tear off any old shingles and sheathing that is not in good shape. This is done by using a large pry bar and drill to loosen the nails that hold each panel in place, then working from one side to the other to unhook them and pull them off. The sheathing will be inspected at this time for water damage and to see if it is in need of replacement.

The underlayment is then installed. Felt paper is the most common, and it creates a barrier between your home and the elements. The roofer will run it along the edge of the roof, over the ice and water barrier and drip edge. It will be nailed down in a pattern that is close together at the edges and further apart towards the middle. This is then repeated for the other side of the roof.

Maintenance

A roof is a big investment, and studies demonstrate that roofing systems that are not properly maintained only last a third to half of their lifespan. To avoid structural damage, a routine inspection and maintenance program should be established.

Look for deteriorated shingles, missing shingle tabs, and cracking caulking. If you see areas that are opening up or displaying signs of leaking, make the necessary repairs now to save money down the road.

Pay special attention to the flashing around your chimney and vent pipes, as well as any places where your shingle ends meet the wood trim of your home. Check the caulk to be sure it is in good condition, and look for any areas where moss or lichen are growing.

The ridgelines of your roof are capped with triangular pieces that protect any cracks or separation between shingles and tiles, but these ridge caps can wear out and break down. When this occurs, water can leak into your home through the exposed ridgeline.

The most basic maintenance task is to keep the roof clear of debris. Debris accumulation can cause ponding water that damages the roof assembly, and it can also block the flow of rainwater to the roof drains. If you have large trees near your home, regularly trim branches that hang over the roof. This will help prevent limbs from breaking off in a storm, and it will keep your roof debris-free. Also, check the ventilation and eaves troughs on a regular basis to ensure they are free from leaves, birds’ nests, or insects.